How to install the AvaCapo Blender add-on
- Jun 2
- 2 min read
AvaCapo is an AI-powered animation toolkit for Blender that helps creators generate character animations faster using motion AI and automation tools. This guide explains how to install the AvaCapo Blender Add-on, connect your account, and start creating animations in Blender.
Important: The current version of the AvaCapo Blender Add-on supports Blender 5.0 and newer only.
Step 1. Download the Add-on
Download the latest AvaCapo Blender Add-on from the AvaCapo website using the Download button.

Step 2. Open Blender Preferences
Launch Blender and open:
Edit → Preferences
This will open Blender's settings window.

Step 3. Open the Add-ons Section
In the Preferences window:
Select Add-ons in the left sidebar.
Click Install from Disk.
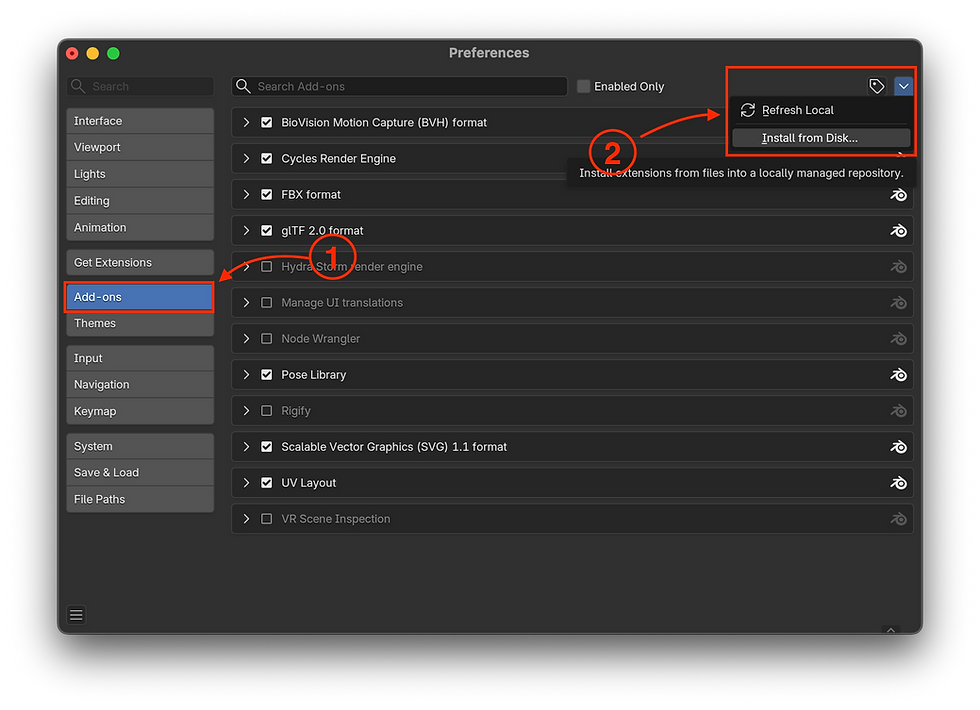
Step 4. Install the Add-on
Locate the downloaded AvaCapo add-on ZIP file and select it.
Do not extract the ZIP archive. Blender installs the add-on directly from the ZIP file.
Click Install from Disk.

Step 5. Open the AvaCapo Panel
After installation, open the Blender Sidebar (N-panel) and locate the AvaCapo tab.
You can authenticate in one of two ways:
Sign in through your browser
Paste an API key manually

Step 6. Open the API Keys Page
To create an API key, sign in to your AvaCapo account at:
In the main dashboard, open API Keys from the left sidebar.

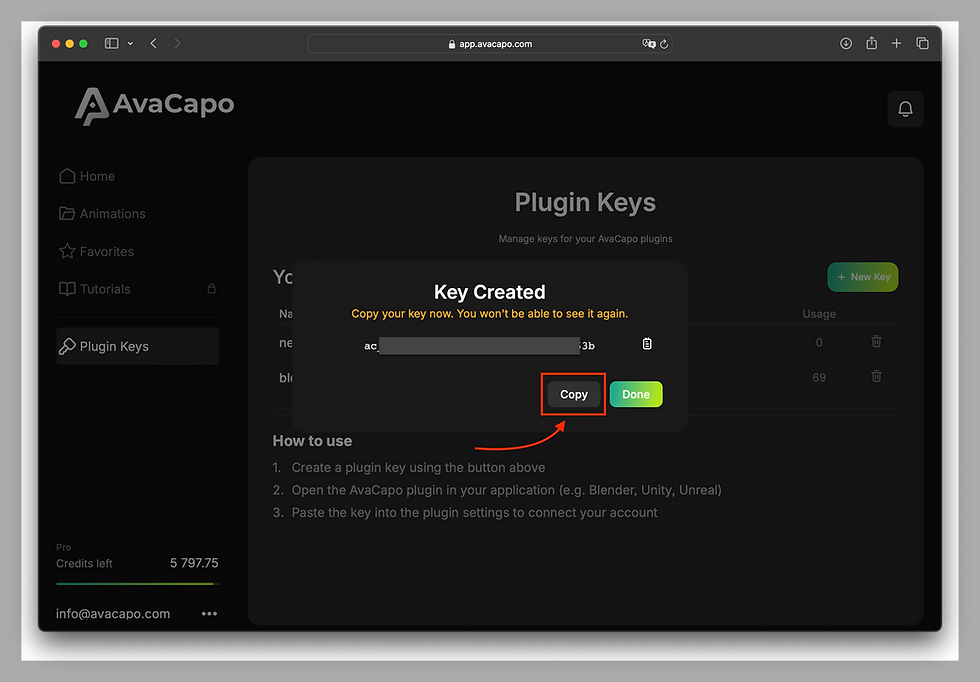
Step 7. Create a New API Key
Click + New Key.

Step 8. Name Your API Key
Enter a name for your API key.
You can use any name that helps you identify where the key is being used.
Click Create.

Step 9. Copy and Paste the API Key
Copy the generated API key.
Return to Blender and paste it into the API Key field inside the AvaCapo add-on.
Important: Your API key provides access to your AvaCapo account and API usage. Keep it private and never share it publicly, publish it online, or include it in screenshots, videos, repositories, or project files.
Browser Authentication (Optional)
If you choose Sign in with Browser, the process can be completed automatically.
If you are already signed in to AvaCapo:
The API key creation page will open automatically.
After creating the key, AvaCapo can automatically send it to Blender.
Your browser may ask for permission to communicate with a desktop application. Simply allow the connection.
In most cases, no manual copy-paste is required.
You're Ready
Your AvaCapo Blender Add-on is now connected and ready to use.
You can start creating AI-powered character animations directly inside Blender.
Next step: Creating Your First Animation with AvaCapo.